Why SSD TRIM Support is So Important and How to Enable It
What is SSD TRIM support and what makes it so important to your solid state drive? Find out the answer here and learn how to enable it for Windows now.
What is TRIM Support and Why is It so Important?
Before you can appreciate what TRIM does, you'll first have to know this: Left unchecked, the performance of a SSD will deteriorate with use. This is due to the awkward way that solid state drives overwrite data to areas that already contain information.
Example: You copy a file to your brand new SSD. Since the file is being copied to a fresh blank space, the SSD is able to write the data directly at full speed. When you delete this file later, it is not instantly removed from the SSD - Instead the operating system simply marks the space taken up by the file as "not in use".
When the operating system requires more space, it will simply overwrite this "not in use" zone. A traditional hard disk drive is able to overwrite data in one single operation, but a solid state drive first has to erase all data in this "not in use" space before it is able to record the new data.
This awful situation is compounded by the fact that solid state drives are only able to delete data in large 512 kB blocks so this slows down the entire overwriting process even more.
Here's how SSD TRIM saves the day: When you delete a file from your SSD, the operating system will still mark the file space as "not in use"... but in addition, a TRIM command is sent to wipe that marked space clean. That way, your SSD is able to write data to that marked space as if it was brand new and skip the cumbersome deletion process.
That's why TRIM is so crucial: It makes sure that your SSD performance doesn't degrade with use, and keeps it (nearly) as fast as new.
In order for TRIM to work its magic, two conditions have to be met first:
- Your operating system has to support TRIM command (e.g. Windows 7 and Windows 8)
- Your solid state drive's firmware has to support TRIM as well
While almost all current solid state drives support TRIM, it never hurts to confirm by checking out their technical specs on their manufacturer's website.
How to Enable TRIM Support for Windows 7 and 8
First let's check if the TRIM command is already active in Windows:
1. Open a Command Prompt window (run as administrator)
Click on Start button → Click All Programs → Accessories → Command Prompt
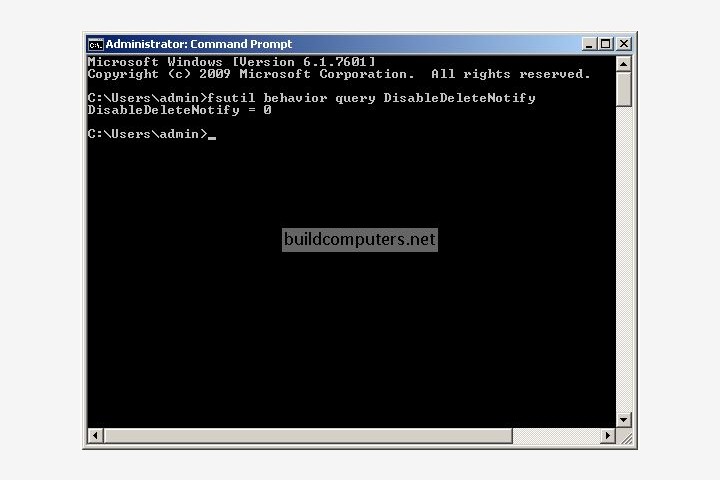
2. Type the following at command prompt and press enter:
fsutil behavior query DisableDeleteNotify

There are two possible outcomes:
- DisableDeleteNotify = 0 : TRIM is already enabled and working in Windows
- DisableDeleteNotify = 1 : TRIM is not enabled → Proceed to step 3 to enable it
3. To enable SSD TRIM support in Windows, type the following at command prompt and press enter:
fsutil behavior set DisableDeleteNotify 0
Recommended Hard Drives
Budget SSD: Crucial MX500 500GB (SATA)
Budget HDD: Western Digital Blue 2TB
Mid Range SSD: Samsung 860 EVO 1TB (SATA)
Mid Range HDD: Western Digital Blue 4TB
Gaming SSD: Samsung 970 EVO 1TB (M.2) / Samsung 860 EVO 1TB (SATA)
Gaming HDD: Western Digital Black 4TB
HTPC SSD: Samsung 970 EVO 500GB (M.2) / Samsung 860 EVO 500GB (SATA)
HTPC HDD: Seagate BarraCuda 2TB
HARD DRIVE GUIDE
- What is a Hard Drive - Types of Hard Drive
- SSD vs HDD - Should You Buy a SSD or HDD?
- How to Run a Hard Drive Benchmark Test
- How to Install a Hard Drive
Hard Disk Drive HDD
Solid State Drive SSD
